Creating Your Avatar
Set up the Unity Editor
- As per the Getting Started section for installing the latest supported Unity editor version and acquiring the Basis framework.
- Open Unity Hub and add an existing project, choose the extracted/cloned Basis project folder
- On the initial project load you will see the following prompt, please hit 'Restart Editor'.

- Once the project has loaded, you can now load in your Avatar files:
- Either,
- Find
Assetsin the Project hierarchy, insideAssetsright-click any empty space and selectShow in Explorer - Copy in your Avatar files [Mesh/Materials/Textures, etc.]
- Find
- or
- Import a .unity package containing your files, from the Assets menu, Import Package > Custom Package
- Bring back the Unity window and allow the import process to finish.
If you place your content within a new directory "Assets > _UserContent" the default .gitignore file with the project will hide changes in git on this folder.
Import Model
- Find the location of your Avatar model (usually provided in .FBX format).
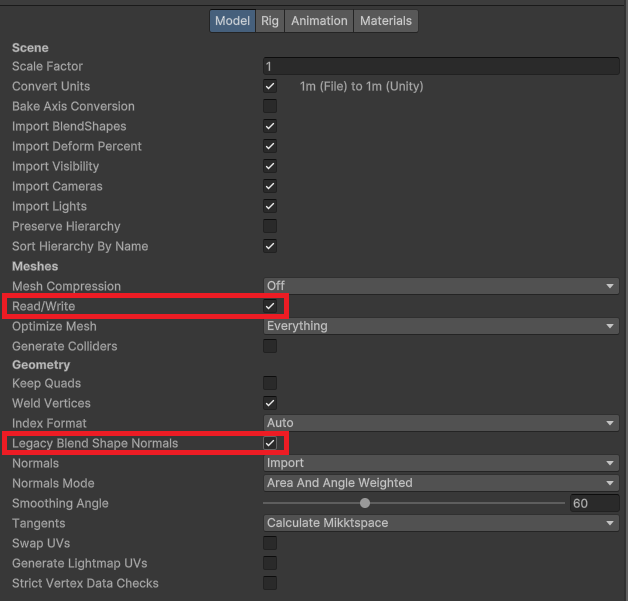
- Click the file and then navigate to the
Modelsection of the Import Settings window. - Ensure that
Red/WriteandLegacy Blend Shape Normalsare selected as below.
- Navigate to the
Rigsection of the Import Settings window. - Click the
Animation Typedrop-down menu and selectHumanoid, pressApplyas shown below.
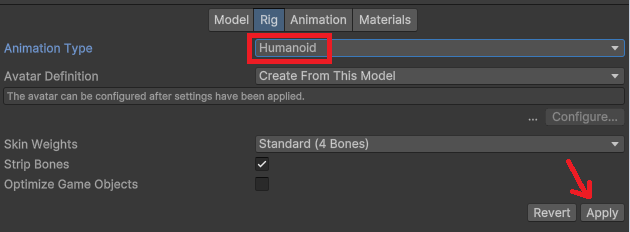
- Afterward, the
Configurebutton aboveApplyis now selectable, click this and then check your bone mappings.
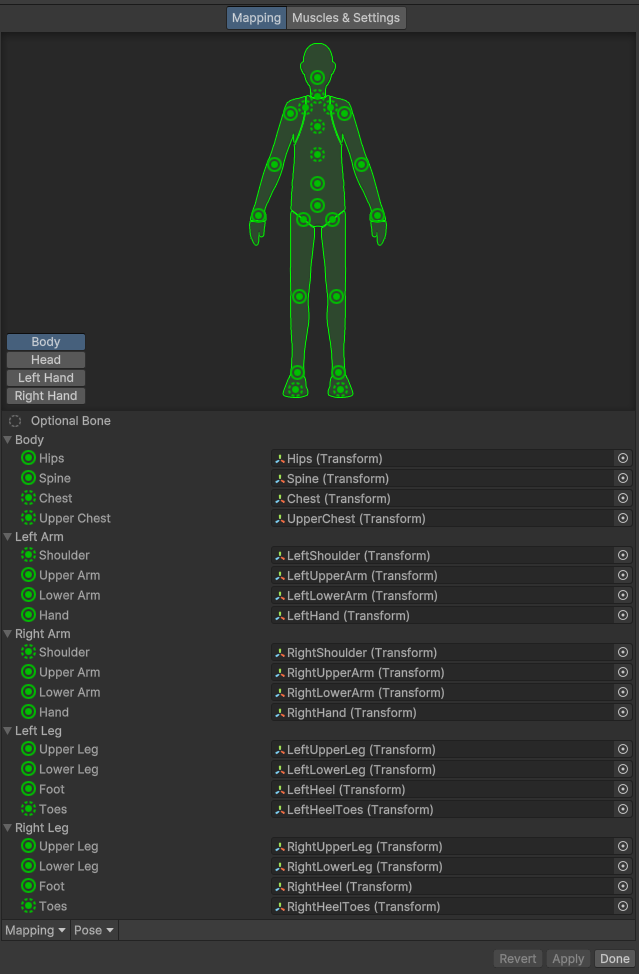
- This should show all mandatory bones as selected; make sure this looks correct for your Armature.
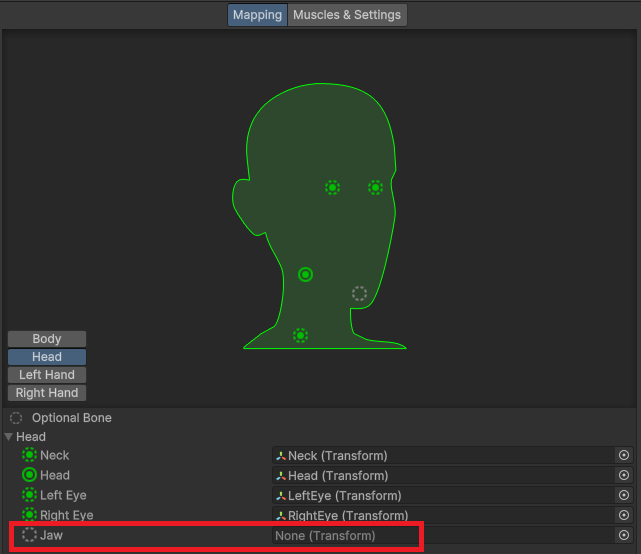
- Lastly, click on the
Headbutton in theMappingwindow and remove the assignment for theJaw; this is usually incorrect.
Skinned Mesh Setup
- There are currently no requirements to name your Avatar's Skinned Mesh as
Bodyor other variation used on Virtual Platforms. - If you have multiple skinned meshes, consider pinning them to all use the same reference point on the body, for inheriting light probes in the scene. You can do this by assigning a bone from the Armature (Usually Hips) to the
Anchor Overridefield.
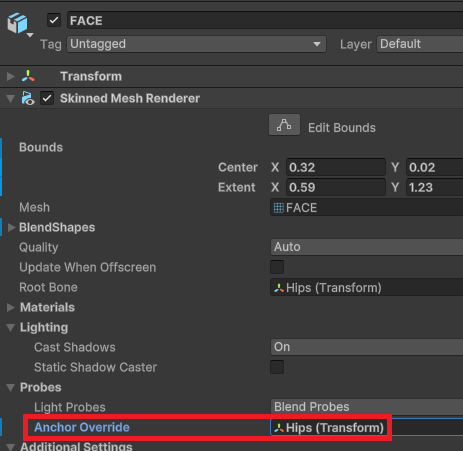
- Another consideration for Avatars with multiple Skinned Meshes is when different bounding box sizes cause individual meshes to pop in and out while the rest of the Avatar is visible to remote viewers.
- You can override the Center X, Y, Z & Extent X, Y, Z values in the section named
Boundsat the top of the Skinned Mesh Renderer component. Usually, it is a good idea to set this the same across the separate Skinned Meshes.

Materials/Shaders
- You can jump straight in with the Universal Render Pipeline/Lit shader that comes with Unity 6
- Otherwise, we have compiled a list of compatible Avatar Shaders that you can use.
Basis Avatar Setup
- The steps above should automatically add an Animator component to your Avatar prefab when you pull it into the Scene.
- On the Parent GameObject of the Avatar, click
Add Component, and addBasis Avatar.
If you're struggling to find the view ball or indicator for the Eye Position, follow these steps:
- Top Right next to XYZ, click the Eye.
- Enable "Eye Position Gizmo" inside of the
Basis Avatarcomponent.
You should now see a green Gizmo for your eyes; move this up between your eyes and on the same plane as your eyes.
Ensure you have assigned each of the following:
- Animator
- Face Viseme
- Face Blink
- Avatar Name
- Avatar Description
Jiggles (Optional)
To add Jiggle Physics:
For each jiggle root:
- Add a new component
Jiggle Rig, next toBasis Avatar. - Ensure to set a
Root Transform. - Probably enable
Motionless Rootto only affect the child bones and not the root itself. (Optional) - Adjust
Settingsto your liking (activateAdvancedto view all settings).
Collision Interaction:
- Activate
Advancedto view all settings. - Enable
Collisionand adjustCollsion Radiusto fit the object.
Eye & Face Tracking (optional)
Integrating VRCFT to drive bone rotation via OSC:
This section will cover usage of Hai's instructions later on.
Avoid Duplicate GameObjects
- Ensure that there are NO duplicate named GameObjects within the hierarchy of your avatar, including the armature, as this will cause your avatar to fail to load after building the AssetBundle.
Build the AssetBundle
- At the bottom of the Basis Avatar component on your Avatar, check that the appropriate build targets for your content are enabled (Windows, Linux, Android etc)
- Press the 'Create Avatar Bee File' button and wait for this process to complete.
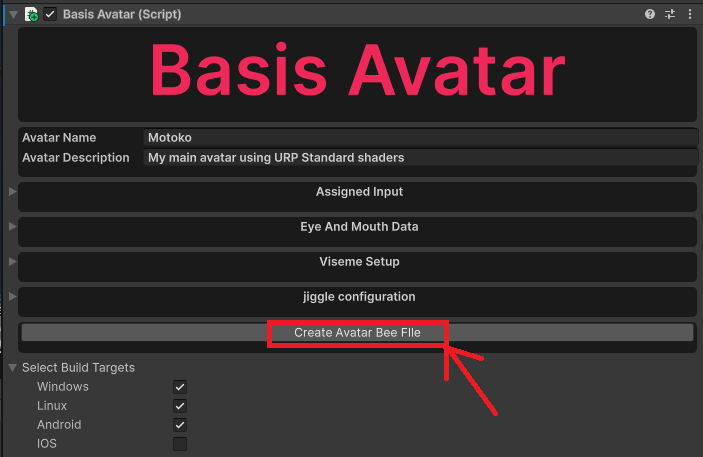
- The results will be opened in a new window automatically as shown below.

Basis uses the .BEE file extension, which contains your compiled asset and meta data, in order to simplify user generated content.
The .BEE file, along with a randomly generated password to access it, is created under your Unity Project path /AssetBundles/ directory and is hidden from Unity by default.
Locally Test the Avatar
Testing the .BEE file locally is not yet supported and will be implemented in the near future, please proceed to Uploading Your Avatar.
Uploading Your Avatar
Basis allows you to load an Avatar .BEE file from a remote URL location, which is also required for other users in a networked session to also load the assets.
In order to support this, you will need to direct link to a remote location. For this example, we will use Google Drive.
(Google Drive supports the direct link of files up to 100MB due to their Virus Scanning policy.)
Upload the BEE file to Google Drive, or any hosting provider that allows direct links to files without login.
- Create a Folder on your Drive and set its sharing settings to "Anyone with the link."
Now when you drag your files into this Folder, you will not individually need to set that permission.
- Click the Hamburger Menu on the Top Right of the asset you have just uploaded into the folder.
- Find "Share" and click "Copy Link."
We will need to look into the URL to grab the information we need for your BEE file.
Example:
https://drive.google.com/file/d/YourIDBringsAllTheLagToMyYard/view?usp=sharing
We want to copy the unique identifier inside of the URL and add it to the following:
https://drive.google.com/uc?export=download&id=
Example:
https://drive.google.com/uc?export=download&id=YourIDBringsAllTheLagToMyYard
DO NOT UPLOAD YOUR GENERATED PASSWORD FILE OR SHARE IT
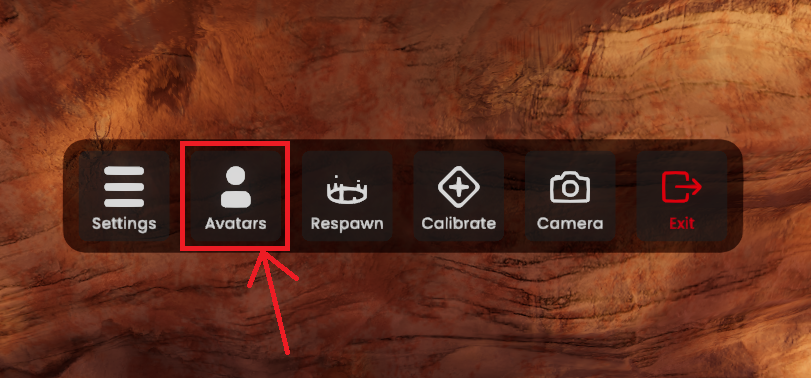
Load up Basis, open the menu, and select Avatars.
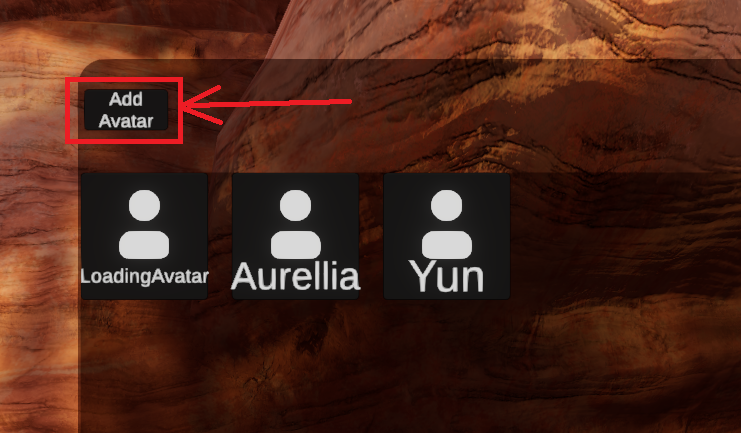
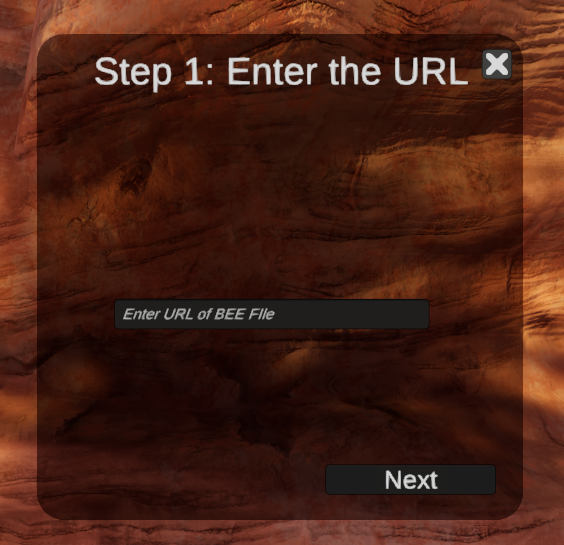
In the Avatar menu, select Add 'Add Avatar' in the top left.
Paste the BEE File URL into the field in the next window.
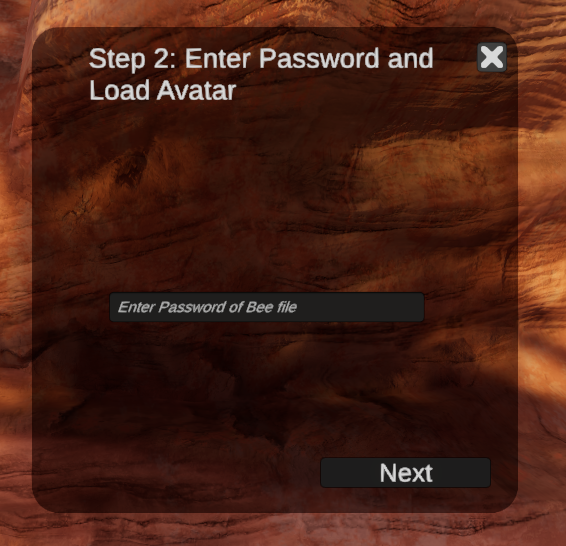
Paste your SUPER SECRET ENCRYPTED PASSWORD into the Password field.
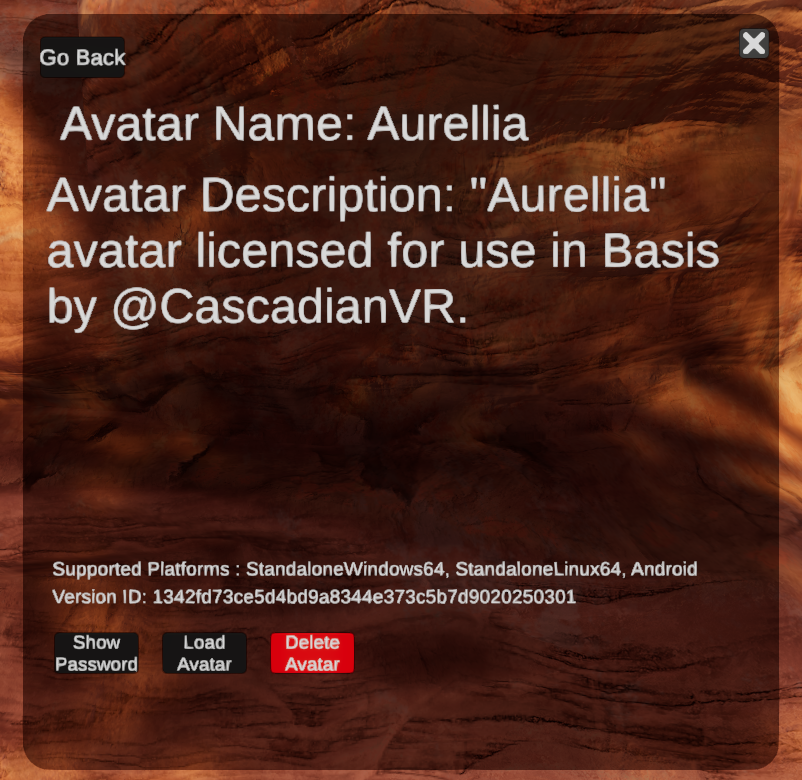
Load! 🥱
Remove Avatars
Basis will save the details of Avatars added through the game menu for convenience. Avatars can be removed by clicking on the Avatar in the menu and hitting the Red Delete Avatar button (Currently no confirmation dialog is shown.)
To remove all saved avatar information, outside of the game interface, you can also do the following:
- Delete
%appdata%\..\LocalLow\Basis Unity\Basis Unity\VerySafePasswordStore.json.
When you next reload the game the previously stored Avatars will now be gone.