
Prop
Setup
Set up the Unity Editor
- As per the Getting Started section for installing the latest supported Unity editor version and acquiring the Basis framework.
- Open Unity Hub and add an existing project. Choose the
Basisfolder inside the folder you extracted or cloned, for exampleBasis-developer/Basis.- This is the folder that contains
Assets,PackagesandProjectSettings. The top-level folder you downloaded is the whole repository and Unity Hub will not recognise it as a project. See Opening the project in Unity Hub.
- This is the folder that contains
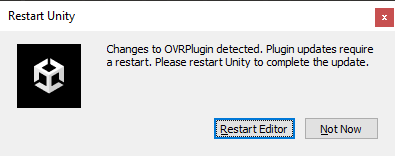
- On the initial project load you will see the following prompt, please hit 'Restart Editor'.
- Once the project has loaded, you can now load in your Avatar files:
- Either,
- Find
Assetsin the Project hierarchy, insideAssetsright-click any empty space and selectShow in Explorer - Copy in your Avatar files [Mesh/Materials/Textures, etc.]
- Find
- or
- Import a .unity package containing your files, from the Assets menu, Import Package > Custom Package
- Bring back the Unity window and allow the import process to finish.
If you place your content within a new directory "Assets > _UserContent" the default .gitignore file with the project will hide changes in git on this folder.
Import Model
- Find the location of your Prop model (usually provided in .FBX format).
- Click the file and then navigate to the
Modelsection of the Import Settings window. - Ensure that
Red/WriteandLegacy Blend Shape Normalsare selected as below.
(INSERT IMAGE REFERENCE HERE)
- Navigate to the
Rigsection of the Import Settings window. - Click the
Animation Typedrop-down menu and make sureGenericis selected.
(INSERT IMAGE REFERENCE HERE)
Skinned Mesh Setup
- One consideration for Props with multiple Skinned Meshes is when different bounding box sizes cause individual meshes to pop in and out while the rest of the Prop is visible to remote viewers.
- You can override the Center X, Y, Z & Extent X, Y, Z values in the section named
Boundsat the top of the Skinned Mesh Renderer component. Usually, it is a good idea to set this the same across the separate Skinned Meshes.
(INSERT IMAGE REFERENCE HERE)
Materials/Shaders
- You can jump straight in with the Universal Render Pipeline/Lit shader that comes with Unity 6
- Otherwise, we have compiled a list of compatible Avatar Shaders that you can use.
Basis Prop Setup
- The steps above should automatically add an Animator component to your Avatar prefab when you pull it into the Scene.
- On the Parent GameObject of the Avatar, click
Add Component, and addBasis Prop. - Enter your preferred Prop Name and Description.
- Before selecting
Create Prop Bee File, ensure that all your shaders are compatible. The BEE file will not generate if there are incompatible shader errors on your Prop. If there are any issues, the inspector will report about it so make sure to resolve them!
(INSERT IMAGE REFERENCE HERE)
In case you're new to Skinned Mesh Renderer blendshapes or uploading Props in general, they're basically just sliders that you can control to change the morphs on your model.
Edit on GitHub
Last updated on