Scripting
For reasons, custom code must either be generated by rebuilding the client (i.e., the Unity project) or via Cilbox (a sandbox CIL).
How to Add Scripts Via Unity Client Build
-
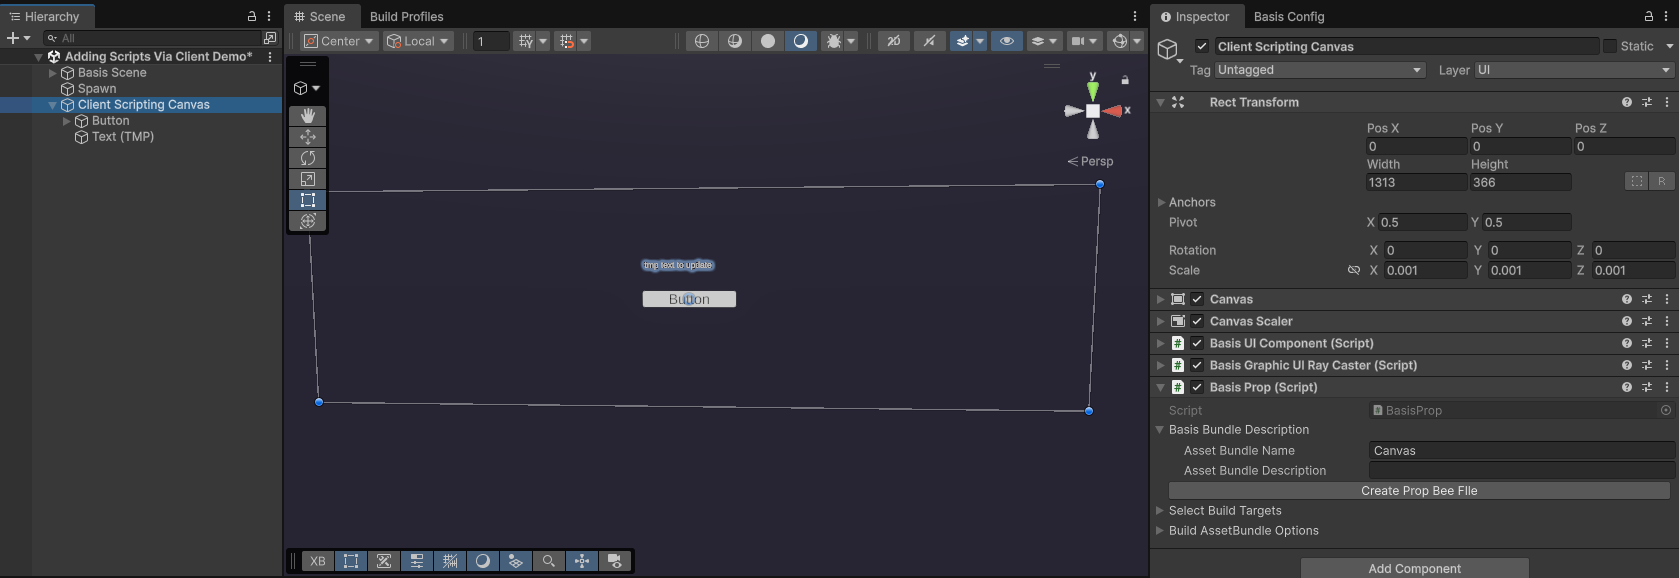
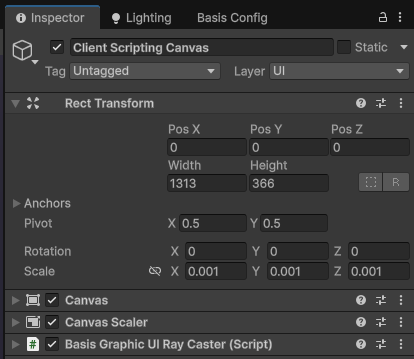
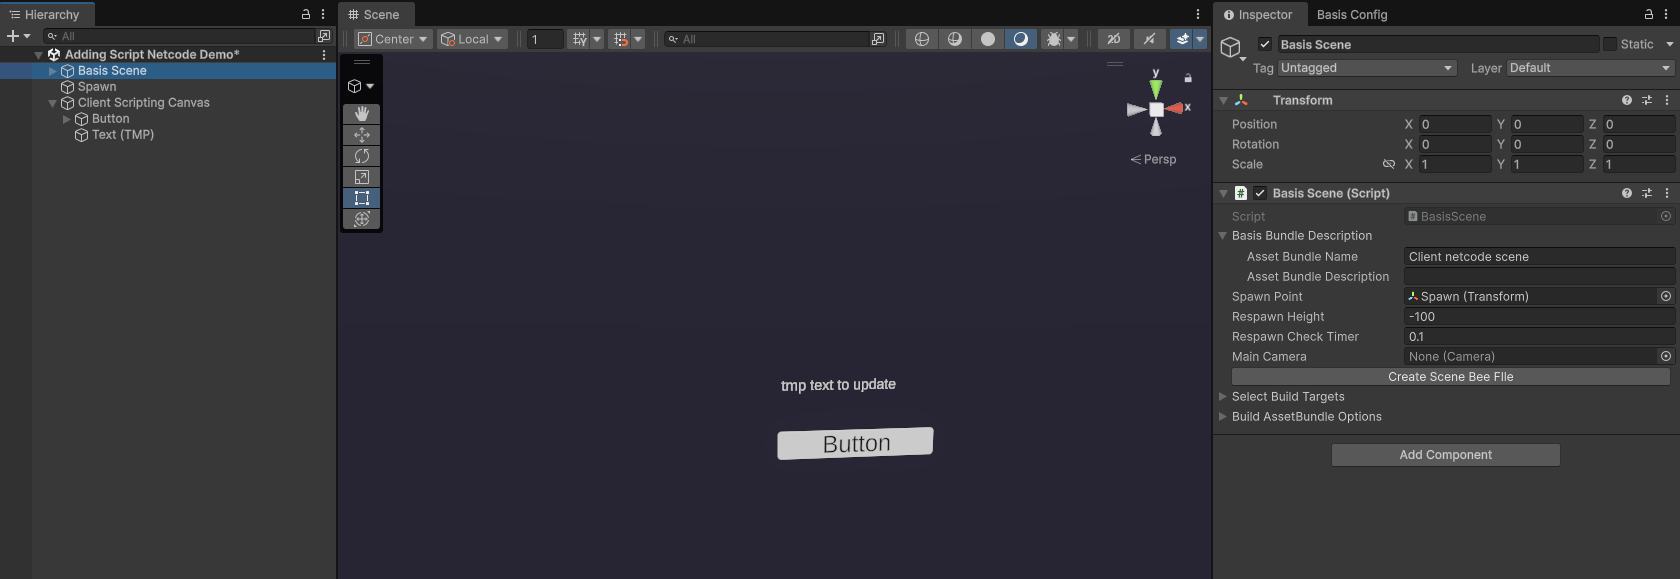
Create a canvas object with a button inside it.
-
Add a script to the button object. As a simple example, we'll create a script that updates a TMP text object called TestButton.
-
Create and assign a TMP text object to the Button Text field in the inspector.

public class TestButton : MonoBehaviour
{
    [SerializeField] private TextMeshPro buttonText;

    public void OnButtonClick()
    {
        buttonText.text = "Clicked!";
    }
}- Select the button and add an onClick() event to it. Assign your Test Button Gameobject to it, making sure to select TestButton.OnButtonClick as the method which your button will call on when clicked.

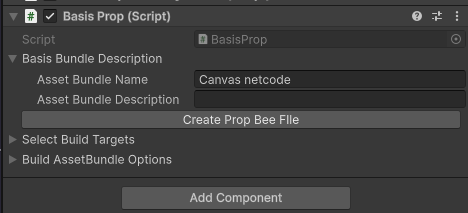
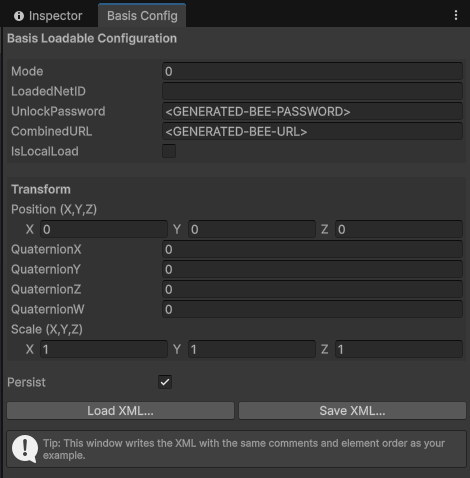
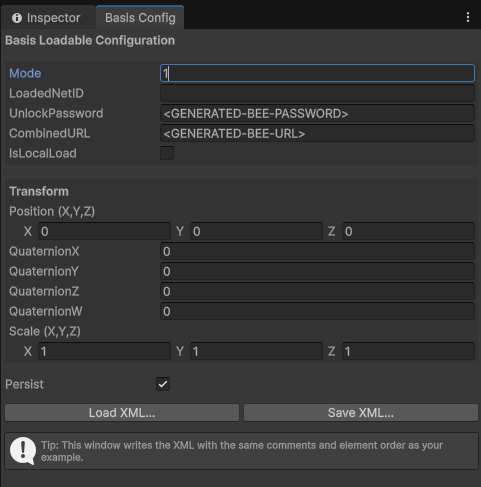
- Add a Basis Prop component to the canvas Gameobject, enter an Asset Bundle Name and press the 'Create Prop Bee File' button. Use the Loadable Config Editor to generate an XML file.
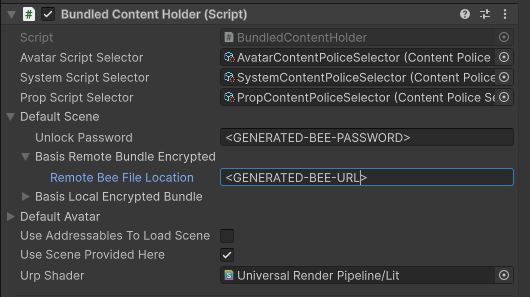
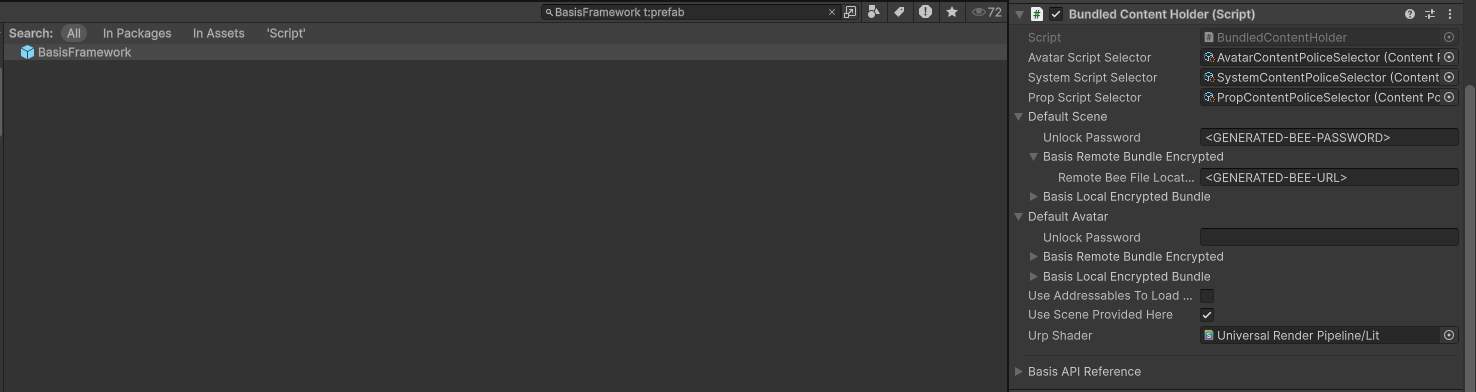
- Open the BasisFramework prefab. In the Bundled Content Folder component's, add the generated .bee password and url.

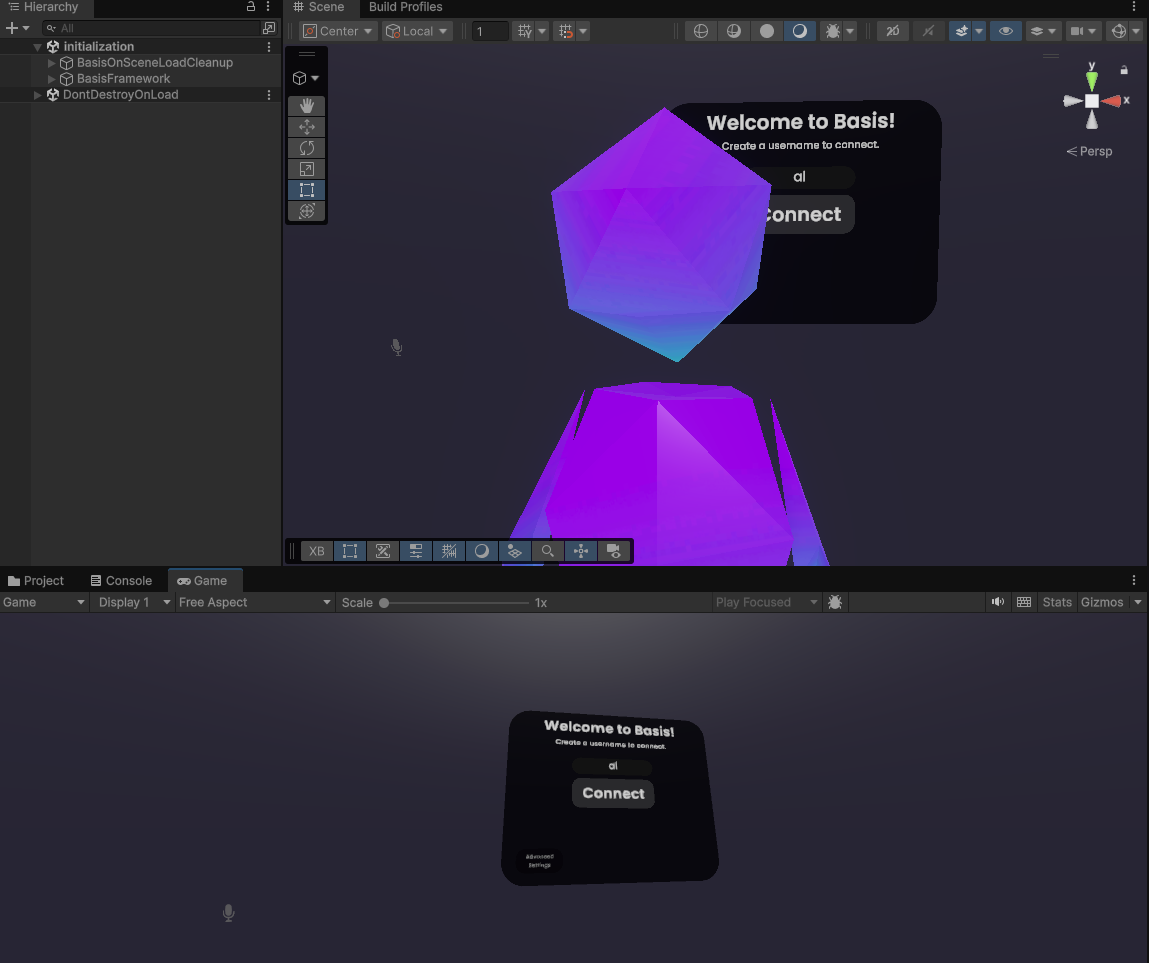
- Run the Initialization scene.
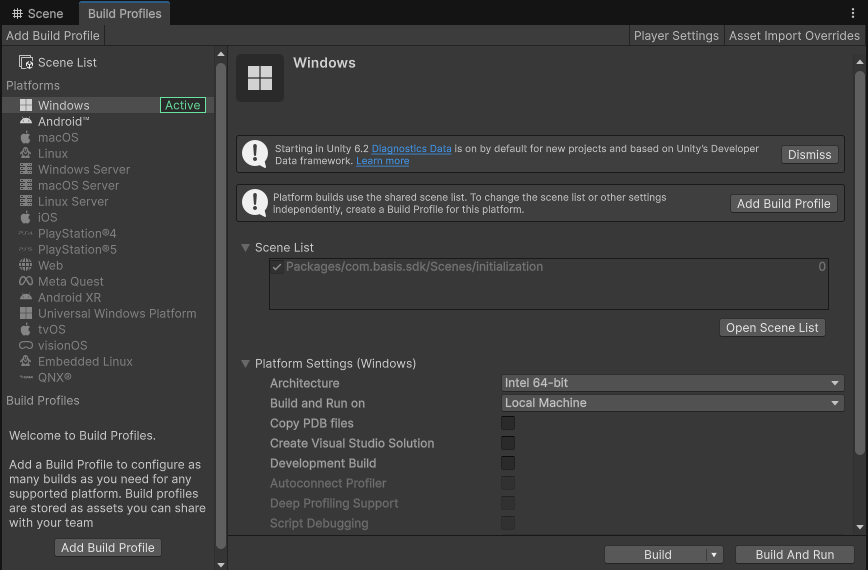
- Build the Unity client. Your custom script will script will be included in the build.
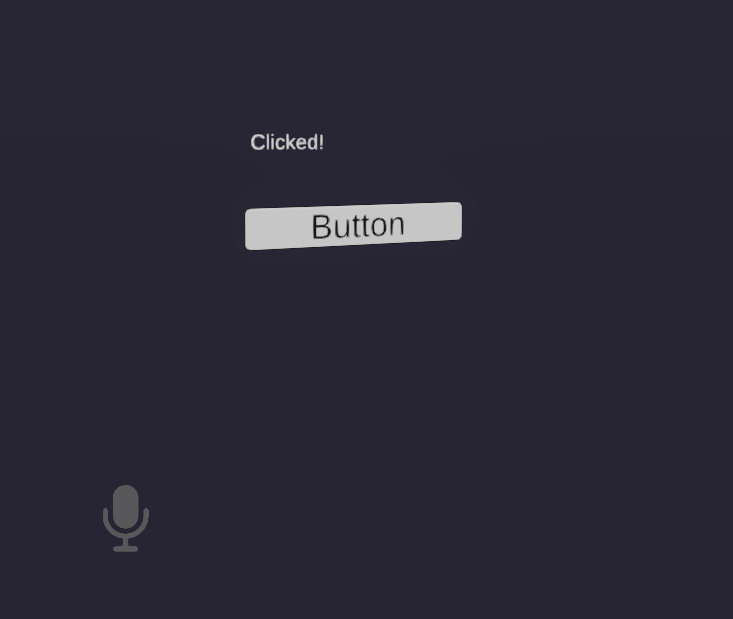
- Click the button and the TMP text object should update to show "Clicked!".
How to Add Network Syncing Scripts Via Unity Client Build
- Create a canvas object with a button inside it.
-
Add a script to the button object. As a simple example, we'll create a script called SCNE (short for Send Custom Network Events) which updates a TMP text object with the count of how many times a button gets clicked.
-
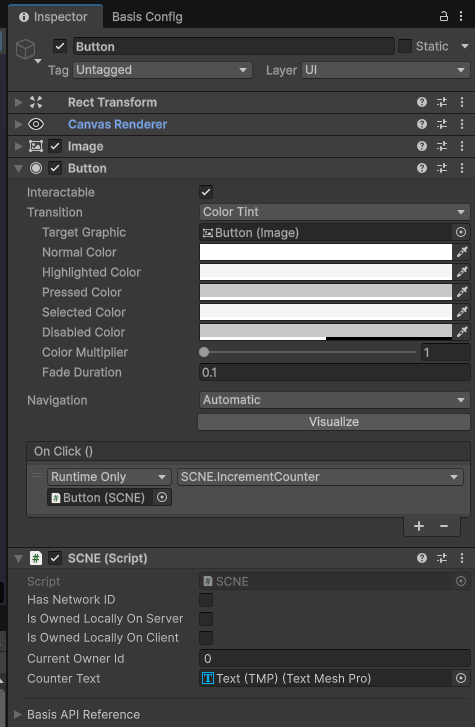
Create and assign a TMP text object to the Button Text field in the inspector.
-
Select the button and add an onClick() event to it. Assign your Button Gameobject to it, making sure to select SCNE.IncrementCounter as the method which your button will call on when clicked.
using Basis;
using Basis.Network.Core;
using Basis.Scripts.Networking.NetworkedAvatar;
using System;
using TMPro;
using UnityEngine;

public class SCNE : BasisNetworkBehaviour
{
    private int counter = 0;

    [SerializeField] TextMeshPro counterText;

    public void IncrementCounter()
    {
        TakeOwnership(); // Ensure we have ownership before sending the update
        counter++;
        SendCustomNetworkEvent(BitConverter.GetBytes(counter), DeliveryMethod.ReliableOrdered);
        OnDeserialization();
    }

    public override void OnNetworkMessage(ushort playerId, byte[] buffer, DeliveryMethod deliveryMethod) // Called when a network message is received
    {
        if (buffer != null && buffer.Length >= 4)
        {
            counter = BitConverter.ToInt32(buffer, 0);
            OnDeserialization();
        }
    }

    public void OnDeserialization() // Called after any change (local or remote)
    {
        Debug.Log($"Counter value is now: {counter}");
        counterText.text = $"Counter: {counter}";
    }

    public override void OnPlayerJoined(BasisNetworkPlayer player) // Ensure late joining players receive the correct count
    {
        if (IsLocalOwner())
        {
            SendCustomNetworkEvent(BitConverter.GetBytes(counter), DeliveryMethod.ReliableOrdered, new ushort[] { player.playerId }); // Send the current counter value to the new player
        }
    }
}
The overridden OnPlayerJoined() is used as, without it, newly joining players would otherwise not see the updated count number.
TakeOwnership() is used to prevent desynchronisation such as the counter value resetting due to a newly joining player clicking on the button.
- Add a Basis Prop component to the canvas Gameobject, enter an Asset Bundle Name and press the 'Create Prop Bee File' button. Use the Loadable Config Editor to generate an XML file.
- Open the PropContentPoliceSelector asset and add the SCNE script to the list of allowed components. This ensures the script is not removed during runtime.

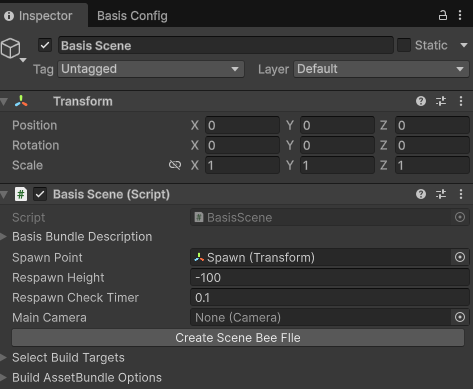
- Add a Basis Scene component to an empty Gameobject, enter an Asset Bundle Name and press the 'Create Scene Bee File' button. Store it in a remote server.
You should disable or remove the canvas object from the scene. This is because keeping it active will result in two copies of it existing in the scene later: one copy from the scene itself and another generated by the XML.
- Open the BasisFramework prefab. In the Bundled Content Folder component's, add the generated .bee password and url.
- Run the Initialization scene.
- Build the Unity client. Your custom script will script will be included in the build.
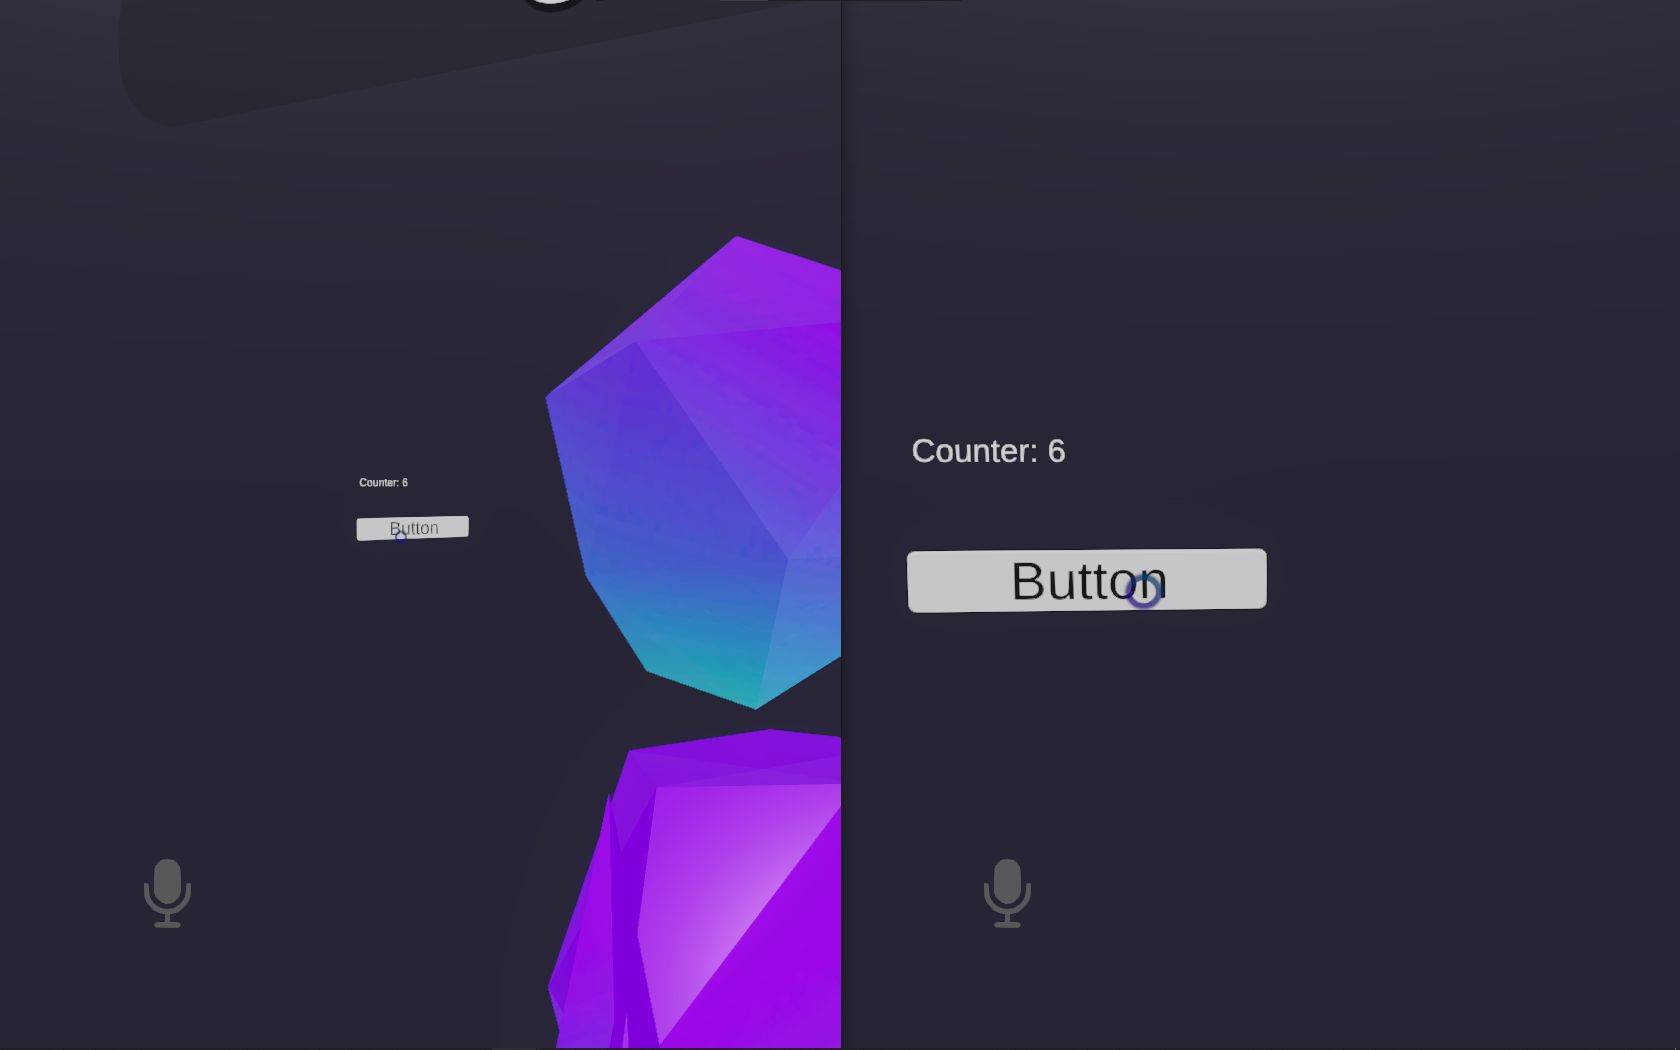
- Click the button and the TMP text object should update the count after each button click for both local and remote players.
How to Add Network Syncing Scripts Via Cilbox
The Cilbox CIL can be used to create scripts that work in runtime. Currently, Cilbox is still quite experimental. The following example shows how to create a script to make a cube rotate using Cilbox.
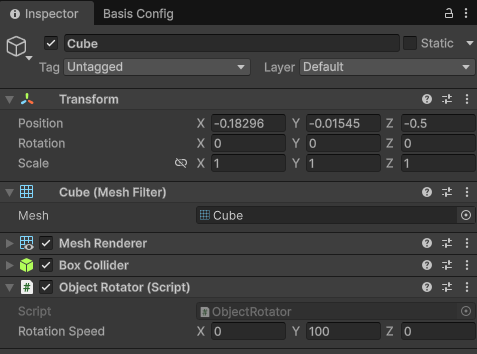
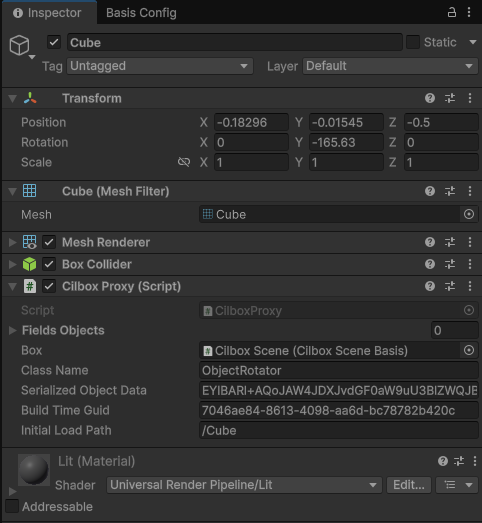
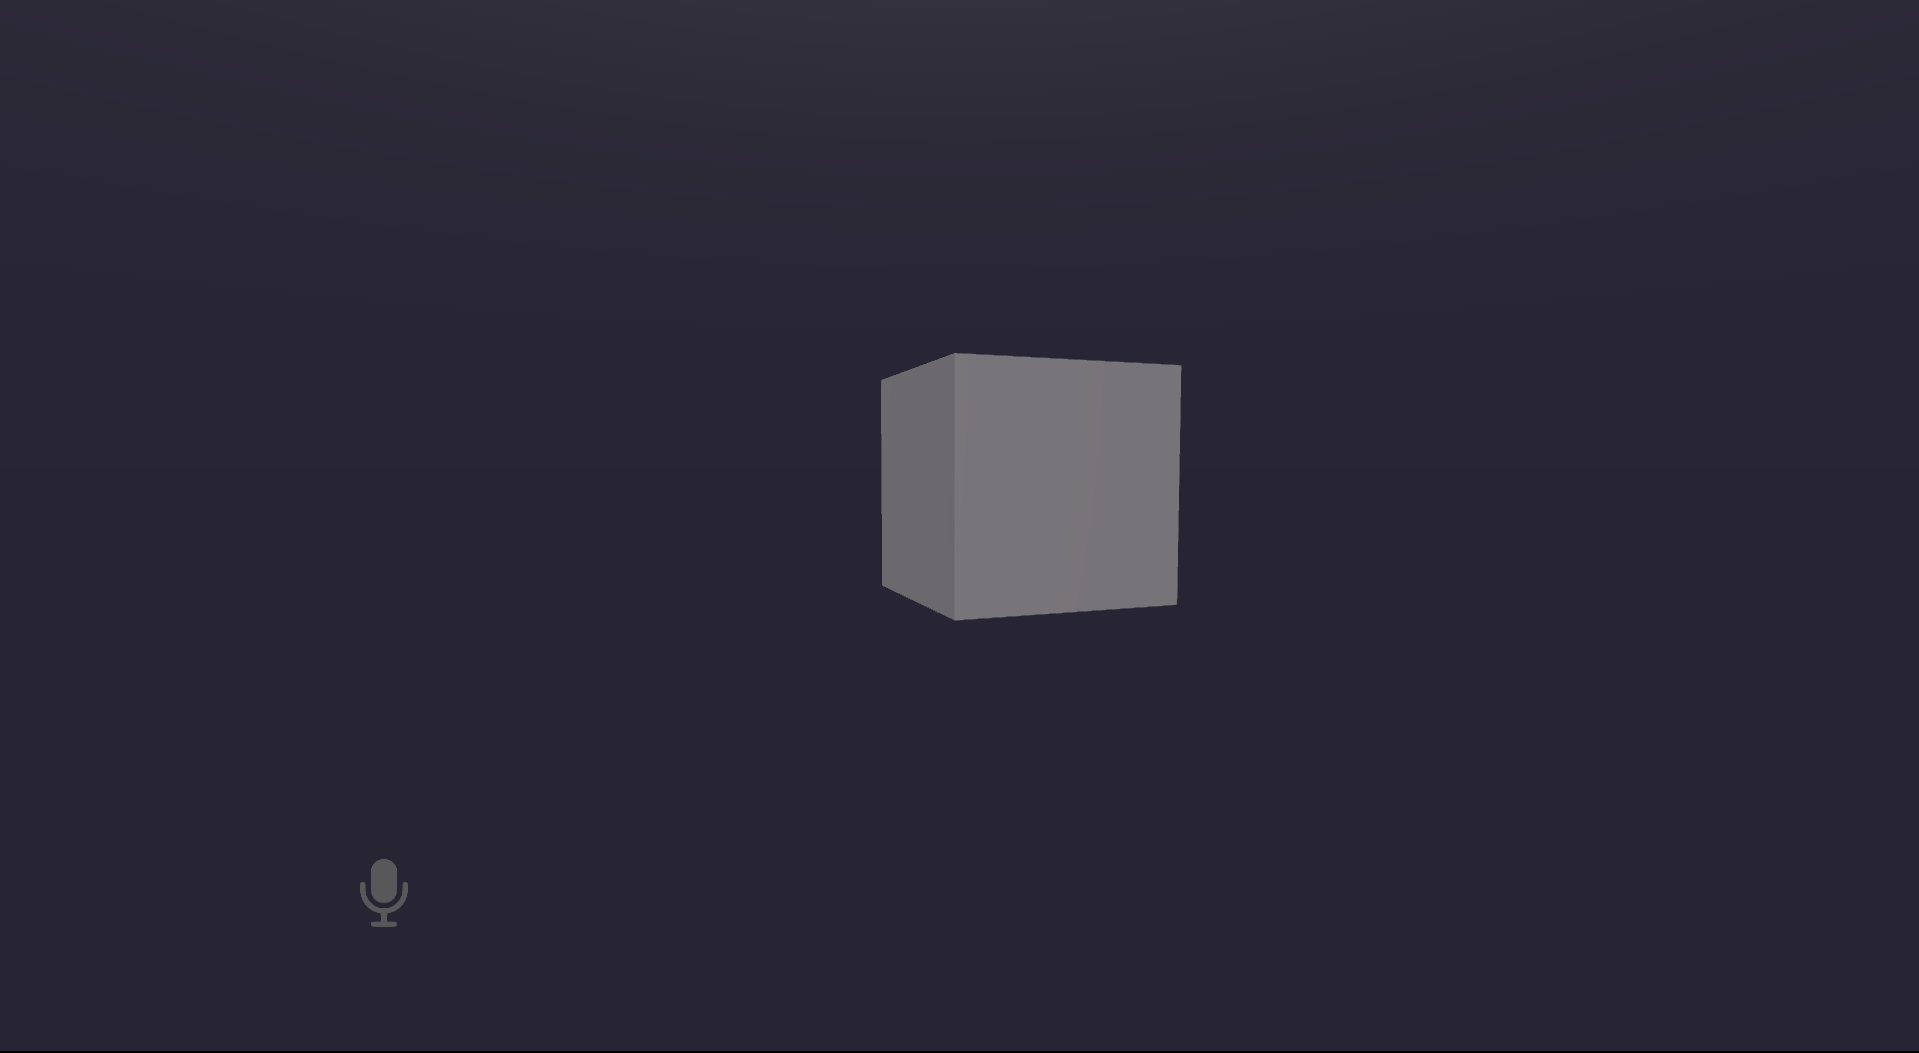
- Create a cube object and an ObjectRotator component to attach to it. Make sure to add [Cilboxable] above your class.
using UnityEngine;

[Cilboxable]
public class ObjectRotator : MonoBehaviour
{
    [SerializeField] private Vector3 rotationSpeed = new Vector3(0, 100f, 0);

    private void Update()
    {
        transform.Rotate(rotationSpeed * Time.deltaTime);
    }
}
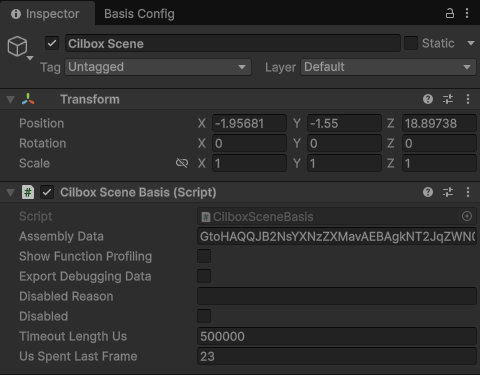
- Create an empty Gameobject and attach a Cilbox Basis Scene component to it. The Cilbox Basis Scene becomes the cilbox that all your scripts run in.
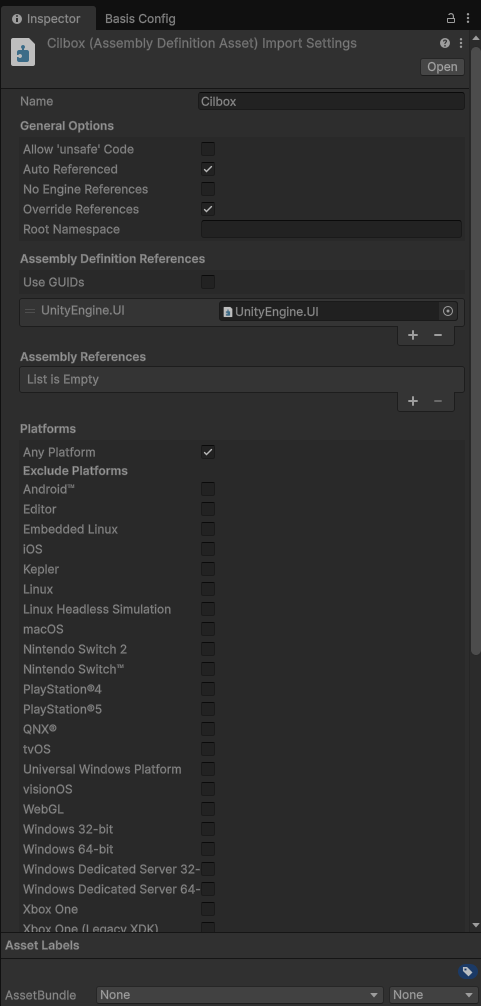
Note: If your editor can't detect the Cilbox namespace, you can either create your own .asmdef file and reference Cilbox, or simply open the Cilbox asmdef and select Auto Referenced to resolve this.
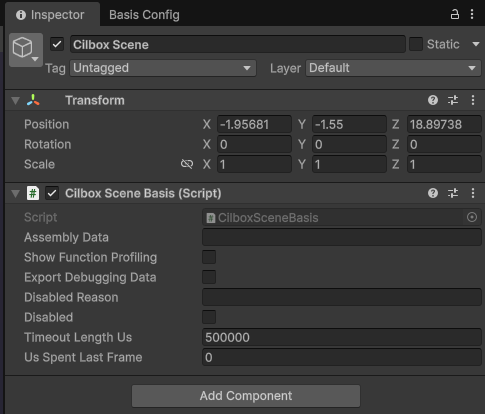
- Add a Basis Scene component to an empty Gameobject, enter an Asset Bundle Name and press the 'Create Scene Bee File' button. Store it in a remote server.
- When you run the scene in playmode, your created script will be compiled by Unity normally. However, before actually being able to play, the scripts are swapped out by a Cilbox Proxy component. These are what actually execute as components during runtime. Basis uses its copy of Cilbox Proxy and Cilbox Basis Scene instead of yours, but your data gets serialized.
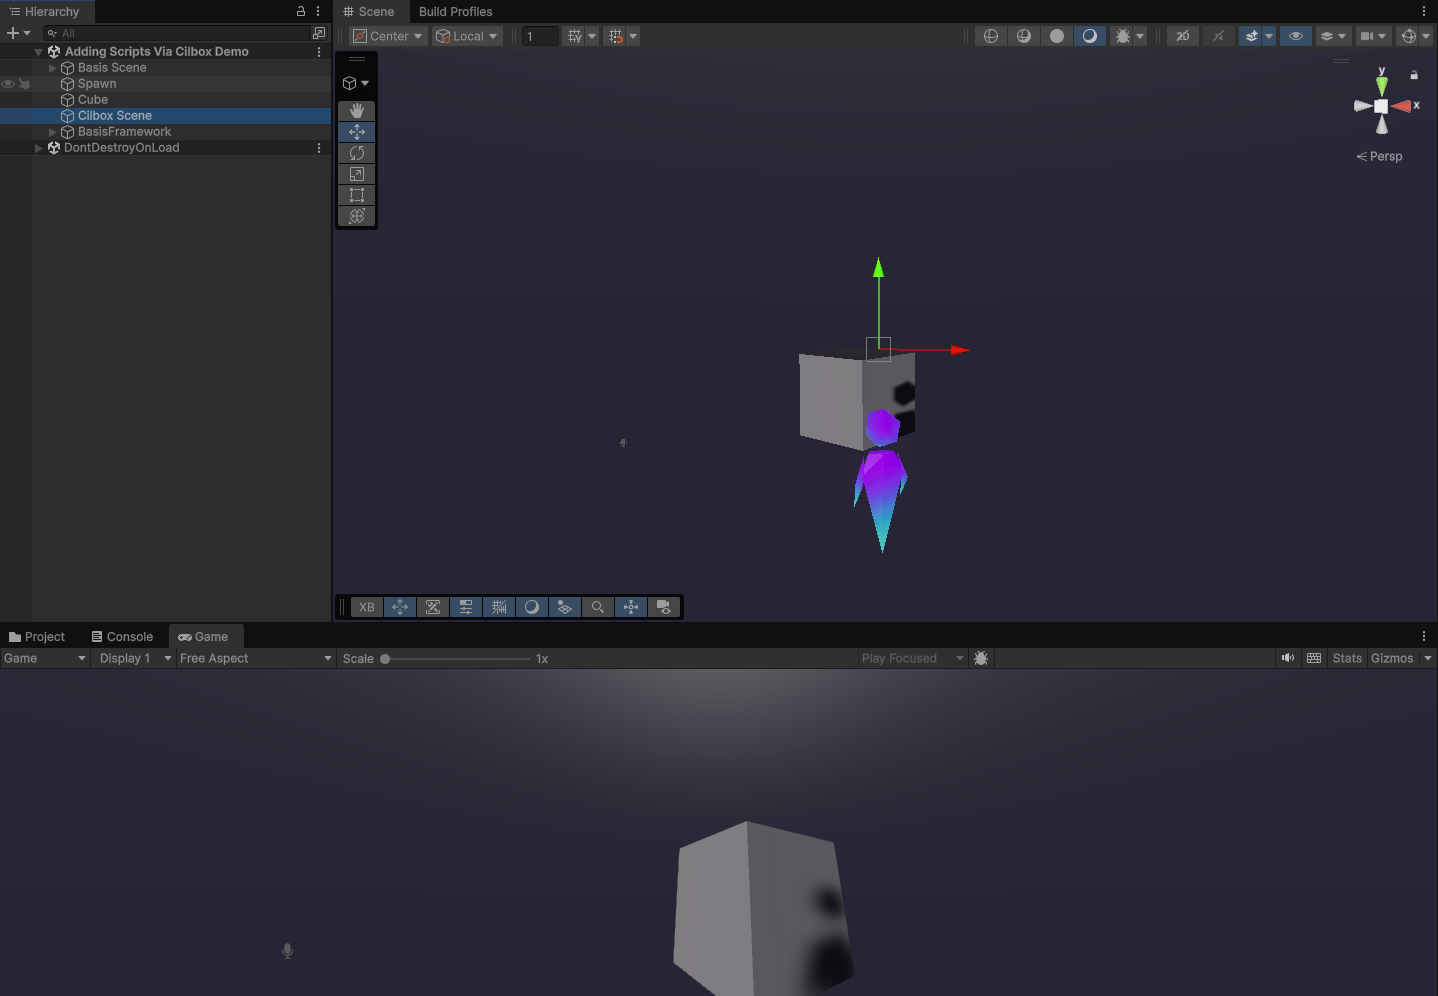
- Run the Initialization scene and test your Cilbox script in the app. The cube should rotate.
Here is an additional example using shaders which you can try.
using UnityEngine;

[Cilboxable]
public class NM_Wind : MonoBehaviour
{
    public Texture2D NoiseTexture;
    public Texture2D GustMaskTexture;
    public void Start()
    {
        ApplySettings();
    }
    void ApplySettings()
    {
        Shader.SetGlobalTexture("WIND_SETTINGS_TexNoise", NoiseTexture);
        Shader.SetGlobalTexture("WIND_SETTINGS_TexGust", GustMaskTexture);
        Shader.SetGlobalVector("WIND_SETTINGS_WorldDirectionAndSpeed", new Vector4(1, 1, 1, 30 * 0.2777f));
        Shader.SetGlobalFloat("WIND_SETTINGS_FlexNoiseScale", 1.0f / 175.0f);
        Shader.SetGlobalFloat("WIND_SETTINGS_ShiverNoiseScale", 1.0f / 10.0f);
        Shader.SetGlobalFloat("WIND_SETTINGS_Turbulence", 30 * 0.25f);
        Shader.SetGlobalFloat("WIND_SETTINGS_GustSpeed", 50);
        Shader.SetGlobalFloat("WIND_SETTINGS_GustScale", 1.0f);
        Shader.SetGlobalFloat("WIND_SETTINGS_GustWorldScale", 0.0016666667f);
    }
}